A “deadlift” is simply any exercise where you lift an object off the ground without momentum. When done correctly, this compound exercise can help you develop power, strength, muscle mass, full body activation, core stability, better posture, and improved grip strength. Despite these benefits, many people avoid this exercise because of the risk of hurting their lower back. However, if you go through this five-exercise progression, you can master the deadlift while reducing your risk of injury.
Exercise #1: Single Kettlebell Sumo Deadlift
The single kettlebell sumo deadlift is the most accessible starting position for most people because it requires less flexibility by shortening the overall range of motion. The wider stance allows for a greater knee bend and a more upright torso placing more emphasis on the quads and less on the back. In the sumo stance, your arms are inside of your knees which naturally shortens the distance of the lift which enables you to use more lat and core activation.
How to Perform:
- Stand slightly wider than hip-width apart with the kettlebell between your feet
- With slightly bent knees, bend at waist trying to activate your hamstrings
- Reach down and grab the handle of the kettlebell
- Activate your lats by turning your elbows in (imagine break the handle in half)
- Brace your core outwards like you are doing a plank
- Drive through the middle of your foot
- Stand up fully until you can fully squeeze your glutes.
- Take a breath
- Reverse the movement
Exercise #2: Double Kettlebell Farmer Carry Deadlift
The double kettlebell farmer carry deadlift is the next progression because you must lift two weights on the outside of your knees with a narrower stance. This progression is still relatively safe because you can still bend your knees as much as you need to maintain a neutral spine. However, the addition of a second kettlebell will challenge your symmetry and balance. The wider weight position makes it more challenging to activate your lats. The narrower stance forces you to bend at waist more and move the weight a farther distance from the ground.
How to Perform:
- Stand hip-width apart with a kettlebell on the outside of each of your feet
- With slightly bent knees, bend at waist trying to activate your hamstrings
- Reach down and grab handle of each kettlebell
- Activate your lats by turning your elbows in (mimic holding a towel in your armpit)
- Brace your core outwards like you are doing a plank
- Drive through the middle of your foot
- Stand up fully until you can fully squeeze your glutes.
- Take a breath
- Reverse the movement
Exercise #3: High Handle Hex Bar Deadlift
High handle hex bar deadlift is the third progression which helps you get comfortable with lifting heavier weights before moving on to the barbell. The shape of the hex bar will allow you to bend your knees more allowing you to activate more quads and lessen the force on your lower back. Also the high handle position will shorten the range of motion. The neutral grip handles allow for higher lat activation which helps you to keep a neutral spine position.
How to Perform:
- Stand hip-width apart with your feet in the center of the hex bar
- With slightly bent knees, bend at waist trying to activate your hamstrings
- Reach down and grab higher handles of hex bar
- Activate your lats by turning your elbows in (mimic holding a towel in your armpit)
- Brace your core outwards like you are doing a plank
- Drive through the middle of your foot
- Stand up fully until you can fully squeeze your glutes.
- Take a breath
- Reverse the movement
Exercise #4: Sumo Stance Barbell Deadlift
The sumo stance barbell deadlift is the fourth progression which is the slightly easier variation than traditional barbell deadlift. The wider stance allows for greater knee flexion, a more upright torso, and an overall shorter range of motion. The turned out feet provide more outer quad and glute activation. The arms being inside the knees allows for more lat activation and shorter range of motion. The transition to a barbell is difficult because you cannot bend as much as you want because your shins and knees will block the bar path. Also the weight is now directly in front of you putting more tension on your hamstrings and lower back. Lastly you are forced to use an overhand, underhand, mixed grip which puts the elbow and forearm in a less dominant position.
How to Perform:
- Stand slightly wider than hip-width apart
- Your toes should be pointed outward with 35-45° angle
- With slightly bent knees, bend at waist trying to activate your hamstrings
- Reach down and grab the barbell between your knee
- Your shins should be as vertical as possible
- Your arms should be straight with your triceps flexed
- Your shoulders should be in line with the bar
- Activate your lats by turning your elbows in (imagine break the handle in half)
- Your chest should be upright as possible while maintaining a neutral spine
- Brace your core outwards like you are doing a plank
- Initiate the lift by simultaneously extending your knees, hips, and back
- During the lift the bar should stay as close your body as possible
- The top position will have the knees, hips, and back fully extended.
- Reverse the movement
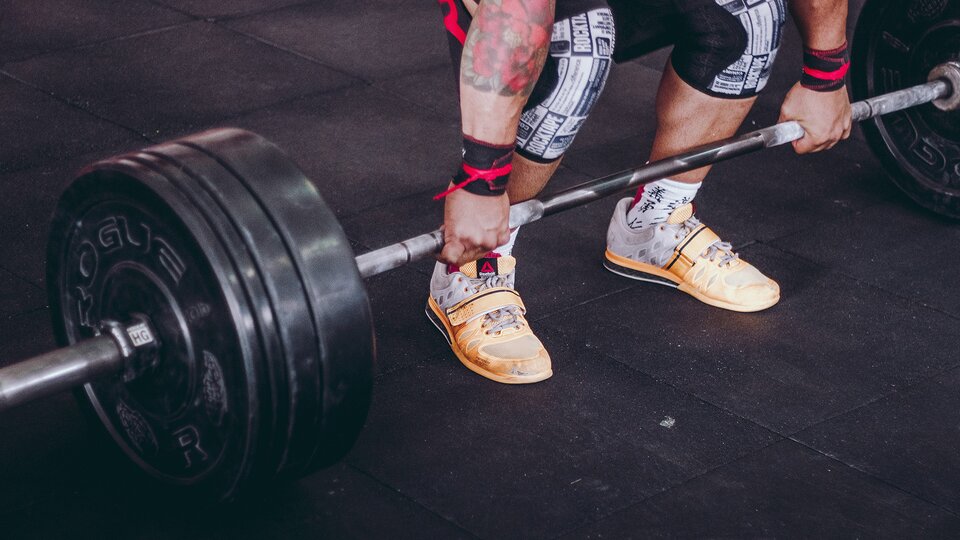
Exercise #5: Conventional Barbell Deadlift
The conventional barbell deadlift is the hardest to perform but the premier exercise for enhancing the muscles of the posterior chain. The bar is placed in front of you making this exercise a true hip hinge pattern placing the most demand on your hamstrings and spinal erectors. The narrower stance and wider grip prevents the knees from bending as much, placing focus on hips and back. However, if you have been mastering the last four progressions, you should be ready to tackle this lift.
How to Perform:
- Stand slightly wider than hip-width apart with the barbell above your midfoot
- Your toes should be pointed forward or slightly turned out
- With slightly bent knees, bend at waist trying to activate your hamstrings
- Reach down and grip the barbell on the outside of your knees
- Your shins should be a vertical as possible but they may angle over the bar
- Your arms should be straight with your triceps flexed
- Your shoulders should be in line with the bar but may be in front of it
- Activate your lats by turning your elbows in (imagine break the handle in half)
- Your chest should be upright as possible while maintaining a neutral spine
- Brace your core outwards like you are doing a plank
- Initiate the lift by simultaneously extending your knees, hips, and back
- The bar should stay as close your body as possible
- The top position will have the knees, hips, and back fully extended.
- Reverse the movement
Conclusion
The overall goal of the deadlift is to activate all the muscles of your posterior chain (hamstrings, calves, glutes, spinal erectors, lats, rhomboids, and traps). However different variations can be used to emphasize certain muscles or to avoid riskier positions.